Theorem is a formula-based wavetable synthesizer designed to turn mathematical formulas into playable sound. This guide will walk you through the interface so you can start turning variables into sound.
The Top Bar

Preset Panel
Use the left/right arrows to step through factory presets, or click on the combobox in the middle to see the preset list. It’s a good place to start if you want to hear what the formula engine can actually do before creating your own sound. You can also use the save and load buttons to create your own presets.
Master Volume
On the right of the top bar you’ll find the Master knob. This controls the output level in decibels, going from -60 dB to +12 dB.
Waveform

Visualizer
The large display in the center of the interface renders your waveform in real time. Type a formula, hit apply, and you’ll see the shape update instantly.
Formula Editor
Below the visualizer you’ll see a text input field and an Apply button. This is where you type your formula. Hit enter or click Apply to update the wavetable.
Here are the variables you can use:
x: Time value in the range [-1, 1]w: Time value in the range [0, 1]q: Harmonic number (1, 2, 3, …) (frequency domain)y: Morph value in range [0, 1]z: Morph value in range [-1, 1]rand: A deterministic random value in [-1, 1]
Warning: You can’t mix time-domain variables (x, w) with frequency-domain variables (q) in the same formula.
Here are some starter formulas you can try:
sin(pi*x): A clean sine wavex: A saw wavesin(pi*x)*y + (1-y)*x: A sine wave morphing into a saw wave
Morph
The Morph slider sweeps through the y and z variables in your formula. If your formula doesn’t use y or z, this slider won’t do anything. But if you’ve written something like sin(pi*x)*y + (1-y)*x, drag the morph slider from left to right and hear the waveform smoothly blend from a sine wave to a saw wave.
Unison
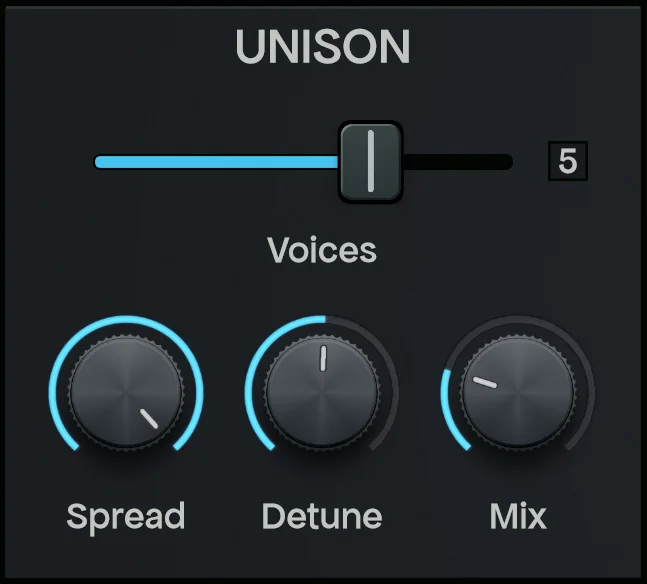
The Unison section sits in the top-left corner. It stacks multiple copies of your oscillator on top of each other and detunes them slightly to create a thicker sound.
- Voices: A horizontal slider from 1 to 7. Crank it up to get a chorus effect.
- Spread: Controls how wide the unison voices are panned across the stereo field.
- Detune: Sets how far apart (in pitch) the stacked voices sit from each other. With small values, you’ll get a subtle chorus, but with very big values, it’ll turn into out-of-tune chaos.
- Mix: Blends between the center voice and the side voices.
Filter
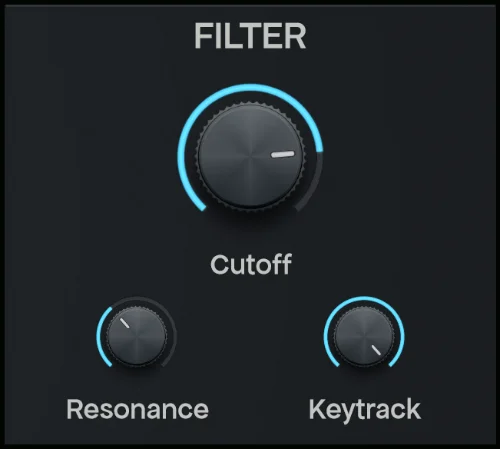
You can control the low-pass filter in the top-right section.
- Cutoff: The big knob at the top. Ranges from 20 Hz to 20,000 Hz. Drag it down to remove the high frequencies and make the sound darker.
- Resonance: Boosts frequencies around the cutoff point. Good to create a ringing effect.
- Keytrack: When set to the maximum value, the cutoff frequency will follow the note you play. At the minimum value, every note gets filtered identically regardless of pitch.
Amplitude Envelope
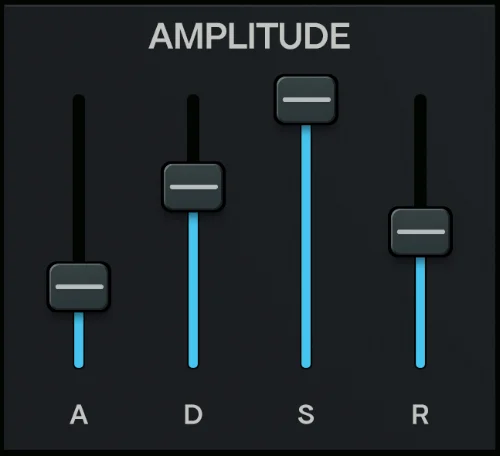
Four vertical sliders control the amplitude envelope, so you can change how each note fades in and out over time.
- A (Attack): How quickly the note reaches full volume after you press a key.
- D (Decay): How long it takes to drop from the peak down to the sustain level.
- S (Sustain): The volume level held while a key stays pressed.
- R (Release): How long the note rings out after you release the key.
Mod Envelope
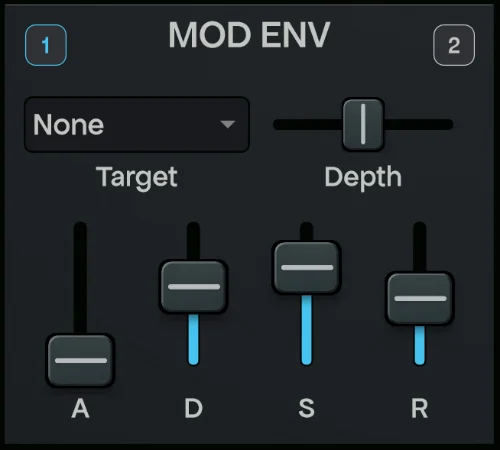
Theorem gives you two modulation envelopes. Toggle between them using the 1 and 2 buttons at the top.
Each Mod Env has its own:
- ADSR: Same concept as the amplitude envelope, but this one shapes a modulation signal instead of volume.
- Depth: A bipolar slider that controls how strongly the envelope affects its target. At the center, it produce no modulation. Drag it left or right to increase intensity in either direction.
- Target: A dropdown menu where you pick what other parameter the envelope modulates.
LFO

Two LFOs with the same switching mechanic as the Mod Envelope. Toggle between the two with the 1 / 2 buttons.
Each LFO has the following parameters:
- Shape: Shape of the LFO: Sine, Triangle, Square, or Saw.
- Rate: Controls the LFO speed from 0.01 Hz (slow) to 20 Hz (very fast).
- Target and depth: Same parameters as the Mod Envelopes.
Effects
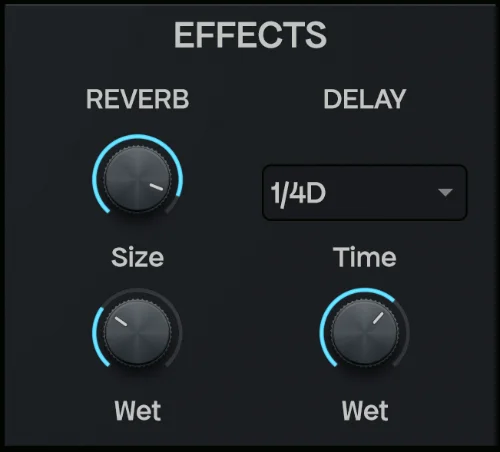
The effects get applied at the very end. They are useful to add that final touch to your sound.
Reverb
- Size: Controls the room size of the reverb.
- Wet: How much of the reverb signal blends into the output.
Delay
- Time: A dropdown synced to musical note divisions:
1/1,1/2,1/4,1/8,1/16and more, including dotted and triplet variants like1/8Dand1/4T. - Wet: Controls the delay’s wet volume and feedback.
That’s It!
You just learned how to translate math into music. Now it’s time to stop reading and start creating. We can’t wait to hear the shapes you create!